Deploy Windows Sandbox through SCCM for standard user
https://sddevblog.blogspot.com/2019/10/deploy-windows-sandbox-through-sccm-for.html
In this post I will demonstrate how to enable the Windows Sandbox feature through SCCM and PowerShell and allow standard users to use it.
What is Windows Sandbox ?
Windows Sandbox is a new feature that allows you to run a virtualized environment from your Windows host computer.
You will be able for instance to execute a specific application on an isolated environment.
Windows Sandbox uses hardware virtualization to create this isolated environment.
You won't need to install a VM to use it.
Indeed it will use OS from your host computer.
You will be able to run it from the Start menu or create a WSB shortcut to run a sandbox with a specific configuration.
Enable execution for standard user
In my last post I explained how to allow standard user to run Windows Sandbox.
For that you will need to add the user to the Hype-V Admin group, below.
See below how to add the current user in this group through SCCM:
The PS1 script
The below script will be used to do the below actions:
- Check if Windows Sandbox is already installed or not
- Enable the Sandbox feature is needed
- Add the current user in the Hyper-V admin group
See below the full script.
It will be used in the SCCM application, copy it to you SCCM server for later.
Create the application
1 / In your SCCM console, go to Software Library then Applications
2 / Click on Create Application
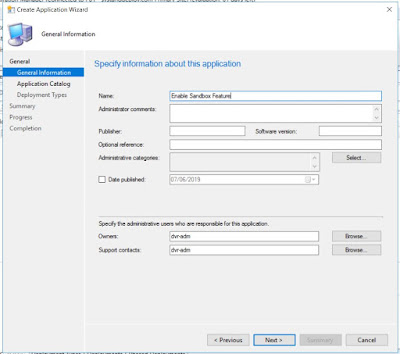
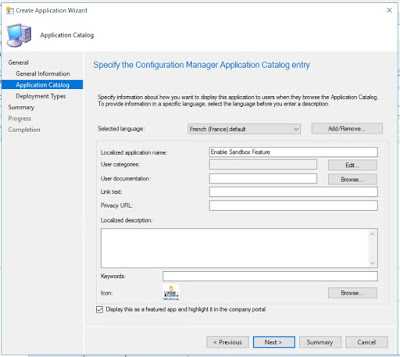
3 / Select Manually specify the application information
14 / In the file or folder type WindowsSandbox.exe
20 / Click on Close
21 / Click on Next
22 / Click on Next
23 / Click on Close
Create the collection
1 / In your SCCM console, go to Assets and Compliance
2 / Do a right click on Device collections then Create device collection
3 / Type a collection name and choose a limit collection
6 / Click on Next
7 / In the Resources class use System Resource
8 / In the Attribute name choose Operating System Build
9 / In the Value part type the build version of the 1903, %18362%
12 / Click on Next
13 / Click on Next then Close
Deploy the Sandbox feature
1 / Go to Software Libray
2 / Do a right-click on the application
2 / Click on Deploy
3 / In the Collection part, browse to the Sandbox collection
5 / Click on Add and select your DP
10 / Click on Close
Install through Software Center
1 / Open the Software Center
2 / The application appears in the Software Center
3 / Click on Install
Check installation
1 / Go to C:\Windows\Debug
2 / Open the file Install_Sandbox_Feature.log
3 / Check in the Hyper-V admin group
4 / Restart the computer
5 / Run Windows Sandbox
Add requirements
In this part we will add some requirements to the application.
1 / For that do a right-click on your application
2 / Click on Properties
3 / Go to Deployment Types
4 / Click on the appli and Edit
5 / Click on Requirements then Add
Computer should have at least 4GB of RAM
6 / Select Total physical memory
7 / Type the RAM to set and then OK
Operating System should be at least 1903
8 / Click on Add
9 / Select Custom then click on Create
10 / Create the custom rule as below then click on OK
11 / Select the new custom rule
12 / Type the 1903 version in the Value part: 18362


